
Welcome to the ESP32 Update Manual.
This document provides instructions on updating the firmware for the ESP32 on your chat cartridge.
If you haven't already downloaded the ESP32 sketch, please proceed to our GitHub page and obtain it by following the link provided on the download page.
Table of content:
1) Install Arduino IDE2) Add support for the ESP32 microcontroller boards
3) Install required libraries
4) Upload the sketch
1.0 Install Arduino IDE
The IDE can be downloaded from: https://www.arduino.cc/en/softwareAt the time of this writing we use version 2.2.1, you should at least use version 2.0.0
Proceed to download and install the Arduino IDE. Specific details about this process are not covered in this document.
2.0 Add support for the ESP32 microcontroller boards
Open the Arduino IDE. In the main menu, go to file > preferences as shown in the image below: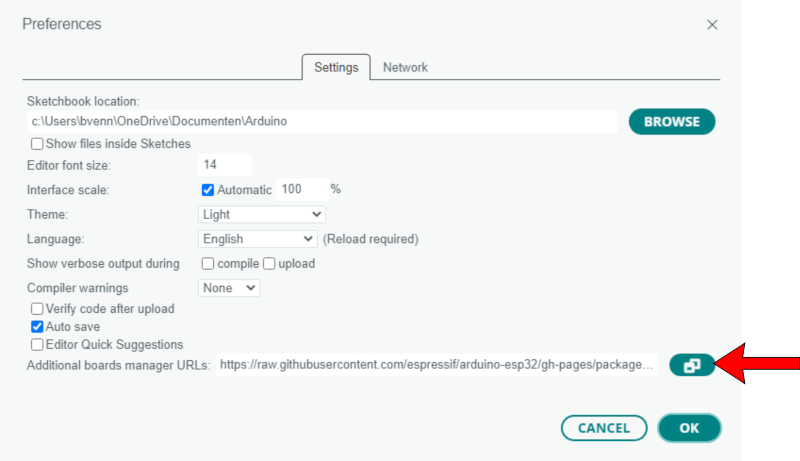
Select the button identified by the red arrow. This will open a textbox, allowing you to configure additional URLs utilized by the boards manager.
Add the following text in that textbox:
https://raw.githubusercontent.com/espressif/arduino-esp32/gh-pages/package_esp32_index.json
press OK to close the “Additional Boards Manager URLs” window and again to close preferences.
2.1 Add the esp32 boards
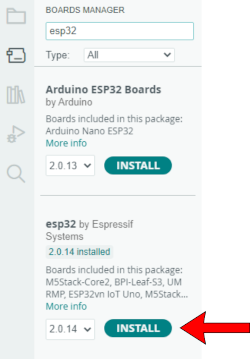
In the menu go to tools > boards > boards manager (CTRL-Shift-B)In the seach field, type esp32. This should give you at least two results. Install the “esp32 by Espressif Systems”. See image:
3.0 Install the required libraries
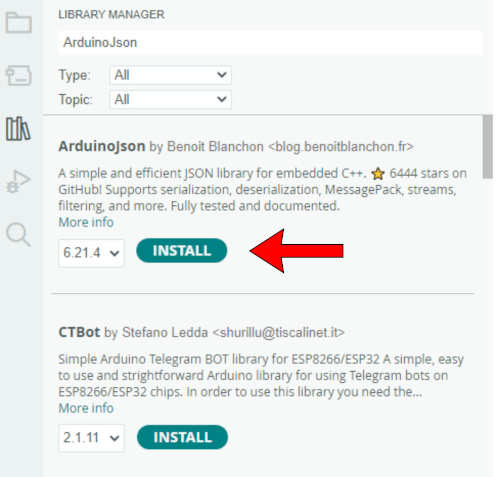
This project relies on several external libraries, conveniently accessible and installable through the Arduino IDE's Library Manager.In the main menu, go to tools > Manage Libraries
Search for the library: ArduinoJson, and install it.
At the time of writing, we use version 6.21.4. The library is written by Benoit Blanchon
4.0 upload the sketch to the ESP32
If you haven't already downloaded the ESP32 sketch, please proceed to our GitHub page and obtain it by following the link provided on the download page.Open the downloaded sketch in the arduino IDE. The IDE might complain about the name of the folder, just click yes and let it create a new folder for you.
4.1 Connect the ESP32 to the computer
Use the correct USB cable to connect the ESP32 to your computer.Select board and port
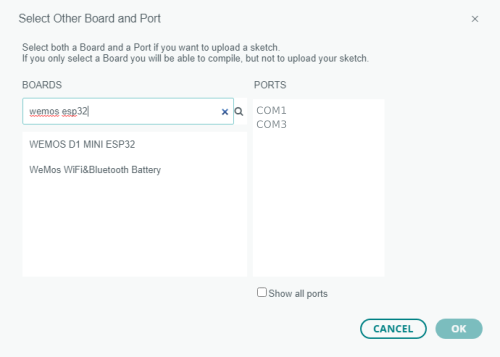
Select this drop down menu and click “Select other board and port”, see image below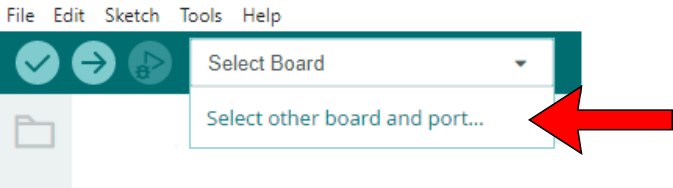
A new window appears (image below), In the left pane, search for “wemos esp32” and it should list the “Wemos D1 Mini ESP32”, select that board.
In the right pane of the same window select the serial port on which the ESP32 is connected.
Press OK to close the window.
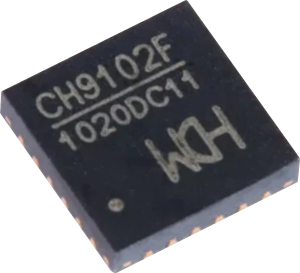
NOTE: You may need a driver
If windows does not detect a new serial port when you connect the ESP32, you may need to install a driver for the USB-to-Serial chip used on the ESP32.- If your ESP32 uses the CH9102F USB-to-Serial Chip. You need this driver for windows 10/11 [driver]
Also, Adafruit has a good article about installing drivers for CH9102F USB to Serial Chips, here is a LINK
- If your ESP32 uses the CP210x USB-to-Serial Chip. You need this driver for windows 10/11 [driver]
5.0 Upload the Sketch
Press the upload button to compile and upload the sketch to the ESP32, this will take a minute.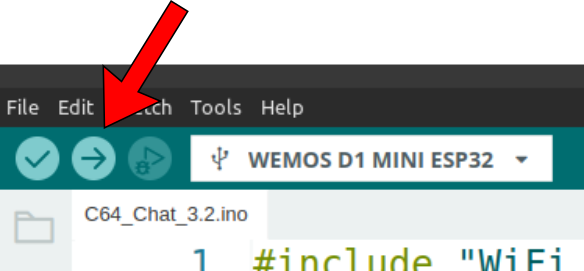
When uploading is finished you should see something like this in the lower pane of the Arduino IDE:

Your ESP32 has now been updated, wel done!